Wednesday, November 22, 2006

Portrait History #6

Rembrandt Van Rijn and Joshua Reynolds

Rembrandt Van Rijn and Joshua Reynolds a short history of these artists.


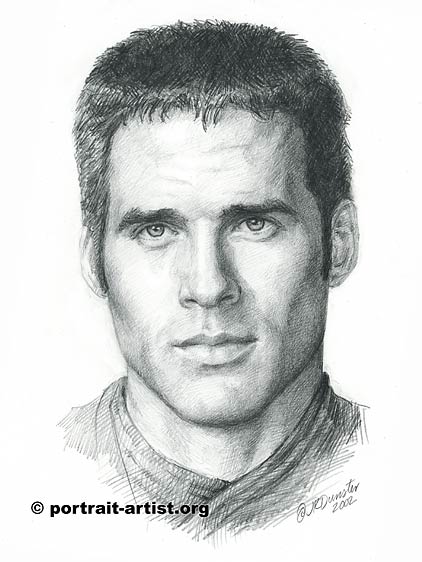
The greatest painter of Holland, and one of the greatest painters that ever lived, was Rembrandt van Rijn (1606-69) who was a generation younger than Frans Hals and Rubens, and seven years younger than Van Dyck. We feel that we know Rembrandt perhaps more intimately than any of these great masters, because he left us an amazing record of his life, a series of self portraits ranging from the time of his youth when he was a successful and even fashionable master, to his lonely old age when his face reflected the tragedy of bankruptcy and the unbroken will of a truly great man.

Here we show Rembrandt's face during the later years of his life. It was not a beautiful face, and Rembrandt Van Rijn certainly never tried to conceal his ugliness. He observed himself in a mirror with complete sincerity. There is no trace of a pose, no trace of vanity, just the penetrating gaze of a painter who scrutinizes his own features, ever ready to learn more and more about the secrets of his human face.

It was only a generation later that an English painter was born whose art satisfied the elegant society of eighteenth - century England-Sir Joshua Reynolds (1723-92). Unlike Hogarth, Reynolds had been to Italy and had come to agree with the connoisseurs of his time that the great masters of the Italian renaissance - Raphael, Michelangelo, Correggio - were the unrivalled exemplars of true art.

Sunday, November 19, 2006

Portrait History #5

Peter Paul Rubens and Frans hals

Peter Paul Rubens and Frans Hals a short history of these artists.

When Holbien had left the German speaking countries painting there began to decline to a frightening extent, and when Holbien died the arts were in a similar plight in England. The one northern artist to come most directly into contact with the roman atmosphere of Caravaggio's days was the Flemish painter called Peter Paul Rubens (1577-1640) Who came to Rome when he was twenty three years old. Rubens admired the way in which Carracci and his school revived the painting of classical stories and myths. When Rubens returned to Antwerp in 1608 he was a man of thirty one, who learned everything there was to be learned.

He was confident that his brushwork could quickly impart life to anything, and he was right. for that was the greatest secret of Peter Paul Ruben's art-His magic skill in making anything alive, intensely and joyfully alive. (Peter Paul Ruben's) The first outstanding master of free Holland was Frans Hals (1580-1666) was forced to lead a precarious existence. Frans Hals belonged to the same generation as Ruben's. We know little about his life except that he frequently owed money to his baker or shoemaker. In his old age-he lived to be over eighty - He was granted a small pittance by the municipal almshouse whose board of governors he painted.

Here we Show one of his magnificent portraits that brought little money to Frans Hals and his family. Compared to other portraits it looks like a snapshot.

Friday, November 17, 2006

Portrait History #4

Leonardo Da Vinci and Hans Holbien

Leonardo Da Vinci and Hans Holbien a short history of these artist

Leonardo Da Vinci's Mona Lisa is not an unmixed blessing for a work of art. We become so used to seeing it on picture postcards, and even advertisements that we find it difficult to see it with fresh eyes as the painting by a real man portraying a real woman of flesh and blood.

What strikes us first with Leonardo Da Vinci's Mona Lisa is the amazing degree to which Lisa looks alive. She really seems to look at us and to have a mind of her own. Like a living being, she seems to change before our eyes and to look a little different every time we come back to her. In the northern countries, in Germany, Holland and England, artists were confronted with a much more real crisis than their colleagues in Italy and Spain. For these southerners had only to deal with the problem of how to paint in a new and startling manner. In the north the question soon faced them whether painting could and should continue at all.

We can witness the effect of this crisis in the career of the greatest German painter of this generation, in the life of (Hans Holbein) the younger. (1497-1543). He was born in Augsburg, a rich merchant city with close trading relations with Italy; he soon moved to Basle, a renowned centre of the new learning. In his earlier portraits he had still sought to display his wonderful skill in the rendering of details, to characterize a sitter through his setting, through the things among which he spent his life.


Wednesday, November 15, 2006

Portrait History #3

Jan Van Eyck

Jan Van Eyck and Leonardo Da Vinci a short history.When France was still the center of Europe, French ideas and styles had a great influence everywhere. Germany was ruled by a family from Luxembourg who had their residence in Prague. There is a wonderful series of busts dating from this period between (1379 and1386) in the cathedral of Prague. These are real portraits.

For the series includes busts of contemporaries including one of the artist in charge Peter Parlour the younger, which is in all probability the first real self-portrait of an artist known to us. (Peter Parlour) the younger)
Jan Van Eyck's art reached perhaps its greatest triumph in the painting of portraits. One of his most famous portraits which represents an Italian merchant, Giovanni Arnolfini, who had to come to the Netherlands on business, with his bride Jeanne de Chenany. A simple corner of the real world had suddenly been fixed on to a panel as if by magic. Here it was-the carpet and the slippers, the rosary on the wall, the little brush beside the bed, and the fruit on the windowsill.

The picture probably represents a solemn moment in their lives-their betrothal. and probably the painter was asked to record this important moment as a witness. (Jan Van Eyck)There is a work of Leonardo Da Vinci which is probably the most famous portrait in today's world-that is the Mona Lisa.

Tuesday, November 14, 2006

Portrait History #2

Greek Portraiture

It was in the time of Alexander that people started to discuss this new art of portraiture. Alexander himself preferred to be portrayed by his court sculptor Lysippus the most celebrated artist of the day, whose faithfulness to nature astonished his contemporaries.

His portrait of Alexander (Alexander the great) shows how much art had changed since the time of praxiteles who was only a generation older than Lysippus. Of course the trouble with all ancient portraits is that we cannot really pronounce on their likeness. Perhaps if we could see a snapshot of Alexander we should find it quite unlike the bust. Egyptians still buried there dead as mummies, but instead of adding there likenesses in the Egyptian style they had them painted by an artist who knew all the tricks of Greek portraiture.

These portraits, which were certainly made by humble craftsmen at a low price, still astonish us by there vigour and realism. Greek and roman art, which had taught men to visualize gods and heroes in beautiful form, also helped the Indians to create an image of their savoir.

The beautiful head of the Buddha with its expression of deep repose was also made in this frontier region of Gandhara..

Monday, November 13, 2006

Portrait History #1

Portrait history from the fourth century BC to the present day.
Many of the most famous works of classical art which were admired in later times as representing the most perfect types of human beings are copies or variants of statues which were created in this period, the middle of the fourth century BC. The Apollo belvedere shows the ideal model of a mans body.
There were many portraits of the human body in these times like Venus which were designed to be seen from the side, and we can admire the clarity and simplicity with which the artist modelled the beautiful body. (Apollo Belvedere) Of course, this method of creating beauty by making a general and schematic figure more and more lifelike until the marble's surface seems to live and breathe has one drawback. It was possible to create convincing human types by this means, but would this method ever lead to to the representation of real individual human beings. Strange as it may sound to us, the idea of a portrait, in the sense that we use the word, did not occur to the Greeks until rather late in the fourth century.
True we hear of portraits made in earlier times, but these statues were probably not good likenesses. A portrait of a general was little more than a picture of any good looking soldier with a helmet and a staff. The artist never reproduced the shape of his nose, the furrows of his brow, or his individual expression. In the generation of praxiteles, towards the end of the fourth century artists discovered means of animating the features without destroying there beauty. more than that they learned how to seize the workings of the individual soul and make portraits in our sense of the word.

Sunday, November 12, 2006

Tips and Tricks: Portrait drawing #7 (contd...)

31 - Generally shadows are cool so exaggerate the blueness in them to make them look really cool, but on occasion shadows are warm (Reds) don't exaggerate warm shadows otherwise they wont look like shadows.

32 - Have you ever seen an head and shoulders portrait where the head looks too big for the shoulders, this is because you haven't drawn the shoulders wide enough, this is a common mistake, make sure the proportions are correct.

33 - If you are drawing or painting a threesome make sure that the two outside people are turning inwards slightly toward the central character if possible.

34 - You can use the side of the pencil or pastel to lay broad areas of tone.

35 - When you draw in the light basic drawing first and then your finished drawing over the top of this, try not to make the finished drawing or painting too mechanical (keeping inside the basic lines you drew firstly). Always think to put life into a drawing by not being afraid to go outside your boundaries or your first lines.

Thursday, November 09, 2006

Tips and Tricks: Portrait drawing #6 (contd...)

26 - When you are painting and you cant make out the overhaul color of the face cut out a 6"x4" card grey in color and make a round hole in it about the size of a one pence piece or a dime and place it against your photograph or live model. Because of the grey neutral color of the card and the small hole you will be able to see the color of the face through the hole without other details distracting you.

27 - When drawing or painting an head and shoulders portrait make features slightly darker than the rest of the portrait, after all these are the most important parts of the portrait.

28 - To make eyes liquid looking put the main highlights in and then a secondary highlight in but fainter.

29 - To put life and vitality into a drawing or painting one quick stroke can add and make all the difference.


30 - Always make dark people cooler and a shade lighter than what they look otherwise they can look too brown and dark.
to be contd...

Tips and Tricks: Portrait drawing #5 (contd...)

21 - When drawing or painting two people in a portrait always have one person higher than the other and when drawing three people always have the person in the middle a little higher than the two outside.

22 - When drawing a portrait don't concentrate too much on a likeness, just concentrate on structure of the face and a likeness will come.

23 - The best angle for a portrait is a three quarter view, that is in between a profile (side view) and a straight on view.

24 - Unless your drawing or painting a full portrait its best to leave the background simple or with no background at all.
25 - If your drawing or painting a dog remember that the dog's nose protrudes more than the rest of the face so use your strongest darks, lights and colors there.


to be contd...

Tuesday, November 07, 2006

Tips and Tricks: Portrait drawing #4(contd...)


16 - Don't draw or paint every little detail in a portrait, for instance all wrinkles and warts, suggest them rather than put everything in.

17 - Make sure you know where the light is coming from even when you are drawing or painting from a photograph and keep your shadows consistent to the light source.

18 - Copy a few drawings or paintings from the old masters in any medium, you might learn a few things, I did!...

19 - When drawing or painting teeth suggest them rather than put them all in individually and don't forget that the teeth go around the oval shape of the head so there is shadow at each corner of the mouth.

20 - Don't put spectacles in as though they were two round or oval shapes, with observation you should notice that parts of the spectacles are lost or are blended into the skin color and other parts show more...(Lost and found edges).

to be contd...

Monday, November 06, 2006

Tips and Tricks: Portrait drawing #3 (Contd...)


11 - Pull out highlights in the eyes after you have shaded them with a rubber or blue tac if you are having trouble leaving white spaces for the highlights.

12 - Always think of structure of the face first before anything else...Get a good book on anatomy.


Some useful books on Human Anatomy:
Drawing Human Anatomy - by Giovanni Civardi - 88 pages
Human Anatomy Coloring Book - by Margaret;Ziemian Matt, Joe Ziemian - 48 pages
Nettler's Atlas of Human Anatomy ... - by Frank H. (ILT) Netter, Celeste G. Kirschner - 484 pages
Anatomy of the Moving Body - by Theodore, Jr. Dimon, Megan Day - 175 pages

Anatomy - by Joseph Sheppard - 224 pages
Gross Anatomy - by Kyung Won Chung - 512 pages

13 - Everything closest to us should be warmer, darker, and lighter, for example the nose is the closest to us so it should be brought out a little more using a warmer color than the rest of the portrait and using a lighter highlight than any other part of the face.

14 - If you are painting a portrait and you are using a background keep it cool using blues to create depth and if you are drawing a portrait, draw the background in a medium tone, the background shouldn't be darker or lighter than the portrait itself. Reserve your darkest darks and lightest lights for the actual portrait.

15 - Use the brightest colors in your centre of interest to draw attention to it, this holds true in any work of art

to be contd...

Sunday, November 05, 2006

Tips and Tricks: Portrait drawing #2 (contd..)

6 - Use hard and soft edges or lost and found edges (The same thing) especially on the outline of a person's face...Lose the line in some places (Lost or Soft edge) and in some places make it harder or darker (Found or Hard edge).

7 - Smudging or blending your pencil or graphite into the paper is ok but don't do it too much otherwise it starts to look mushy. On top of the blended areas, put in a few directional pencil strokes to show the form. ie...If part of a person's face looks as though its curving around like the cheek follow this form with your pencil stokes whichever way the form seems to go.

8 - Point your drawing or painting at a mirror and look in the mirror yourself to see if your portrait is structured properly...You can often see your mistakes more easily this way

9 - Variety is the key to good depth in a portrait so use a variety of tone from the lightest lights to the darkest darks, there is a lot of shades between these two extremes and its this variety that gives you the depth.

10 - More often the eyes are the most important feature in a person's face, make them stand out more than any other part of the person's face by making the darks a touch darker and this will make the lights a touch lighter.

to be contd...

Friday, November 03, 2006

Tips and Tricks: Portrait drawing #1

There might be a few things you never knew here, check them out...

1 - When drawing or painting from a photograph or from life get your angles by holding your arm out to its fullest length and holding the pencil vertically or horizontally. Example...(Horizontal) to get the angle of the eyes hold your pencil (Horizontally) across the inner eye corners. (Vertical) See where the left corner of the mouth comes to the inner corner of the eye (Vertical)

2 - Sometimes when drawing or painting from a photograph you tend to draw what you see, for instance when the person you are drawing or painting is smiling you can sometimes stunt the smile and therefore making the person's smile look static, meaning you draw the smile less wide than what it is. Always draw a person's smile a little bit wider than what it is to compensate.

3 - Eyeballs are round so put shadow in both corners to show that they are three dimensional.

4 - Nostrils have depth so don't just draw them as black holes, look carefully and you will see that there is lighter areas aswell as the darker ones.

5 - The top half of a child's head is bigger than the bottom half. (From the top of the head to the eye line).


to be contd...

Thursday, November 02, 2006

Sketch


A sketch is a rapidly executed freehand drawing that is not intended as a finished work, often consisting of a multitude of overlapping lines. Sketches usually serve quickly to record ideas for later use. Sketches are inexpensive and allow the artist to try out different ideas before committing to an expensive and time consuming painting or fresco. Sketching sharpens an artist's ability to focus and has often been a prescribed part of artistic development for student and professional alike.
Dry media such as pencil or pastel are often preferred due to time constraints. Graphite pencils being a relatively new invention, the artists of the Renaissance made sketches using a silver stylus on specially prepared paper (known as silverpoint), with results similar to a modern pencil sketch, or used charcoal, chalk, or pen-and-ink.

The Vitruvian Man


The Vitruvian Man is a famous drawing with accompanying notes by Leonardo da Vinci made around the year 1492 in one of his journals. It depicts a naked male figure in two superimposed positions with his arms and legs apart and simultaneously inscribed in a circle and square. It is on display in the Gallerie dell' Accademia in Venice, Italy.
This image provides the perfect example of Leonardo's keen interest in proportion. In addition, this picture represents a cornerstone of Leonardo's attempts to relate man to nature. It shows that He believed the workings of the human body to be an analogy for the workings of the universe. It is also believed by some that Leonardo symbolised the material existence by the square and spiritual existence by the circle. Thus he attempted to depict the correlation between these two aspects of human existence.
The drawing itself is often used as an implied symbol of the essential symmetry of the human body, and by extension, to the universe as a whole.

free web counter
free web counter